Step-by-Step Guide

How to Buddy
Tape a Jammed
Finger.

Four steps. Two fingers. The technique that turns a bent or sprained finger into something you can still use today — and why the tape you choose decides whether the next two weeks are bearable or not.

Scroll for the method

What Is Buddy Taping?

Buddy taping is the technique of taping an injured finger to an adjacent healthy finger so the healthy finger acts as a natural splint. It stabilizes the joint while still allowing controlled bending, gripping, and everyday hand use. It is the standard first-line treatment for jammed fingers, mild sprains, and post-splint rehabilitation.

You jam a finger catching a basketball, take a bad volleyball block, or bend one back pulling on a stuck drawer. The joint swells, movement hurts, and the question is what to do about it. For mild to moderate jams and sprains, the answer is almost always buddy taping. The injured finger gets lateral support from its neighbor, and you keep enough range of motion to grip, type, drive, and function through recovery.

That's the difference between buddy taping and a rigid splint. A splint immobilizes the joint completely — necessary for fractures and severe injuries. Buddy taping stabilizes the joint while preserving movement — appropriate for jammed fingers, mild sprains, and post-splint rehab when your doctor clears partial motion. If you're trying to decide which one you need, our buddy tape vs splint guide walks through the call in detail.

Most guides stop there and move to technique. But there's a problem most of them skip: the tape itself. Standard adhesive tape bonds to skin. On a swollen, tender finger that needs daily tape changes for two to four weeks, removal becomes its own injury. Every change pulls on inflamed skin, tugs hair, and leaves residue that's nearly impossible to clean off puffy joints. Buddy taping with adhesive tape works mechanically — but the daily ritual ranges from unpleasant to agonizing.
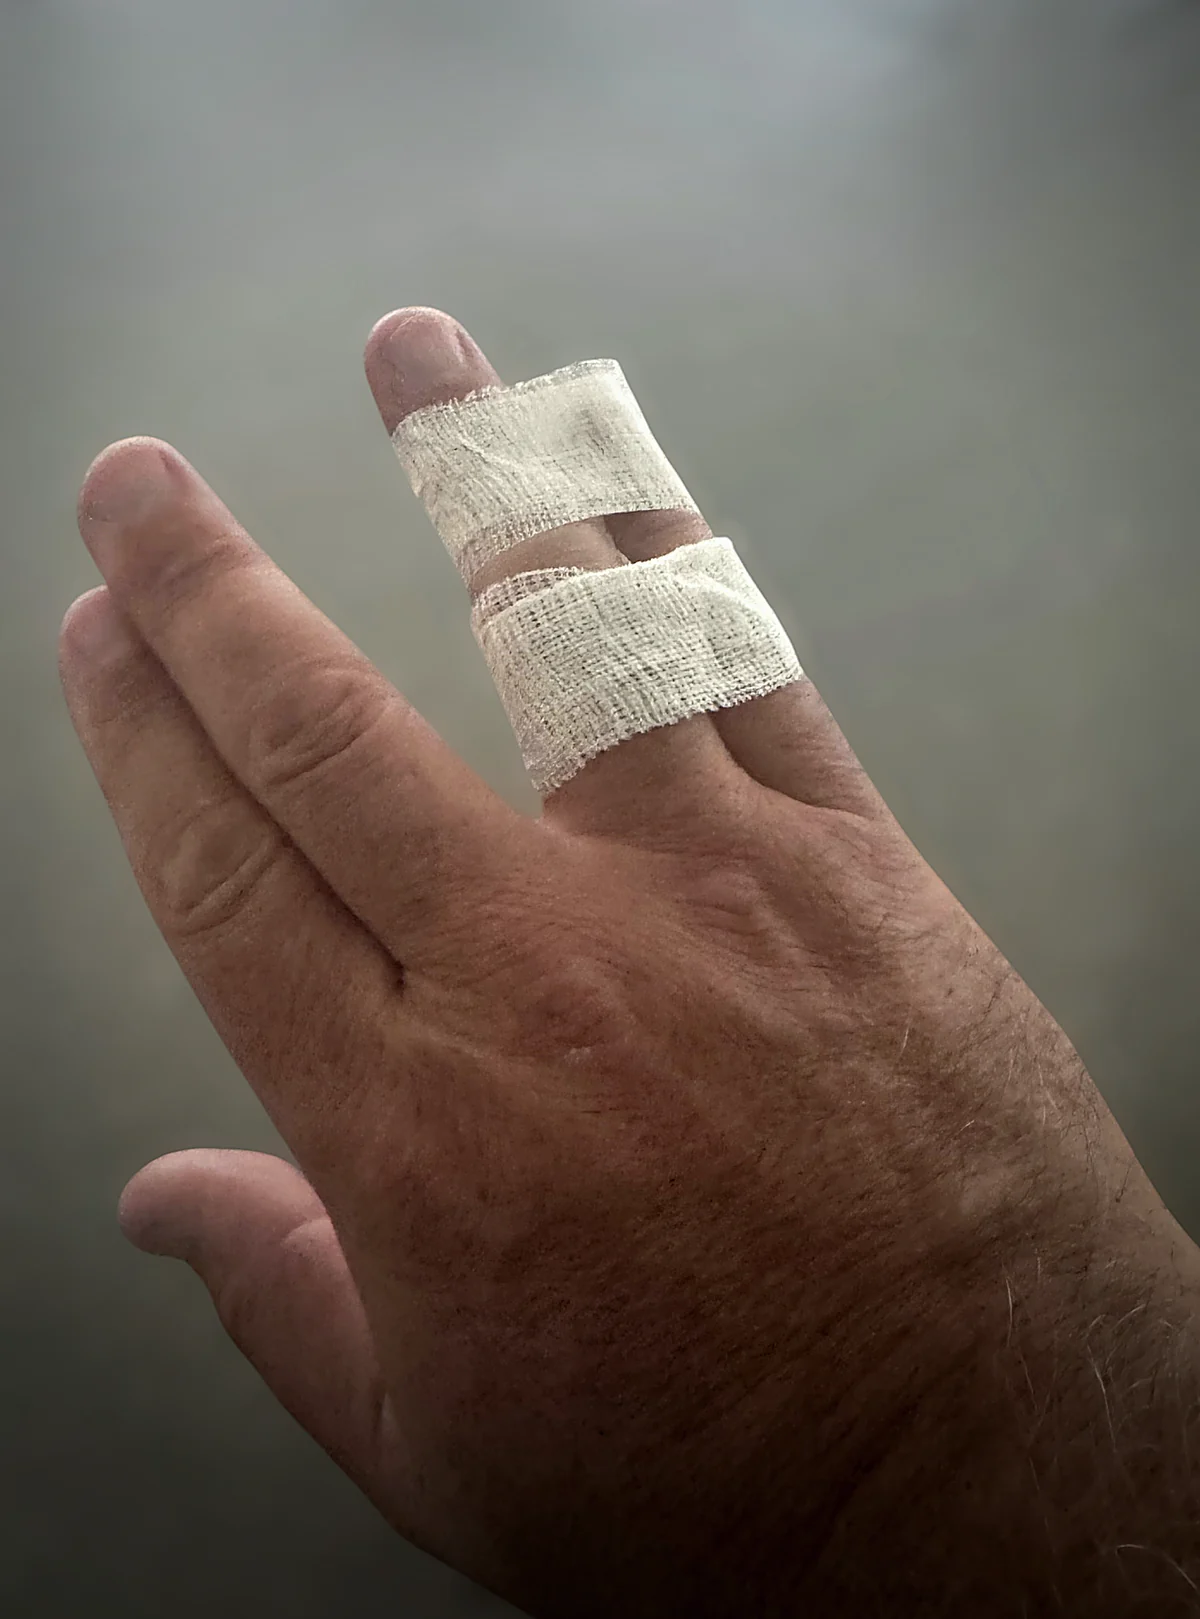
Two fingers buddy taped together with self-adhering tape, with bands above and below the middle joint and the fingertip left exposed
The Technique

Two Fingers, One Splint

Buddy taping uses an adjacent healthy finger as a natural splint. Two wraps — one above and one below the injured joint — provide lateral stability while allowing controlled bending. The injured joint heals in alignment without complete immobilization.

Why Self-Adhering Tape Changes Buddy Taping

Self-adhering tape — tape that sticks to itself but not to skin — solves the daily tape change problem that makes buddy taping with adhesive tape so unpleasant. Guard-Tex bonds layer to layer through cohesion. Nothing sticky ever touches the swollen finger. Application is painless because the tape slides over inflamed skin without gripping. Removal is painless because there's nothing bonded to your skin to pull.

For a jammed finger that needs buddy taping for two to four weeks, that's 14-28 daily tape changes. With adhesive tape, each one is a small ordeal. With self-adhering tape, each one takes ten seconds and causes zero discomfort. The mechanical support is identical — lateral stability from the buddy finger, controlled by wraps above and below the joint. The only difference is whether your tape fights your skin or ignores it.

Self-adhering tape also solves the repositioning problem. Adhesive tape is a one-shot application — once it's stuck, adjusting it means ripping it off and starting over with a fresh strip. Self-adhering tape can be unwound and rewrapped during application until you get the tension and position right. For buddy taping, where wrap placement relative to the joint matters for both support and comfort, this repositionability is a significant practical advantage.

"I buddy-taped my ring finger for three weeks after a basketball jam. The first week I used athletic tape — every tape change was torture on the swelling. Switched to Guard-Tex and couldn't believe the difference. Same support, zero pain taking it off."
Ryan K. — Recreational Basketball Player
0
Adhesive Contact
5M+
Rolls Shipped
0
Residue Left
100%
Made in USA

Before You Tape — When Not to Buddy Tape

Buddy taping handles minor finger injuries: jammed fingers, mild sprains, and the rehab phase after a splint comes off. It does not handle every finger injury. Tape the wrong injury and you delay the medical care you actually need.

See a doctor first if any of these are true:

The finger is visibly deformed or pointing at an unnatural angle. You can't bend it at all, or bending it produces sharp pain rather than dull soreness. The fingertip is numb, white, or noticeably colder than the others. Swelling is severe enough to make the joint look two sizes larger than its neighbor. The injury came from a hard impact — a closing car door, a fall onto an outstretched hand, a direct hit from a baseball or hockey puck.

Any of those signs may mean a fracture, dislocation, or torn ligament — injuries that need imaging, reduction, or a fitted splint, not buddy tape. For everything else — the everyday jammed-finger story — keep reading. For a full breakdown of when buddy tape is the right call versus when you need a rigid splint, see our buddy tape vs splint guide.

How to Buddy Tape an Injured Finger

Buddy taping is straightforward — but small technique details make the difference between a wrap that supports all day and one that slides, pinches, or restricts movement. Here's the method.

1

Choose the Right Buddy Finger

Pair the injured finger with the adjacent finger that matches closest in length. Index pairs with middle. Ring pairs with middle or pinky. Pinky pairs with ring. The buddy finger acts as a natural splint — size match matters for joint alignment and comfortable flexion.

Never buddy tape the thumb. Thumb injuries require a thumb spica splint — buddy taping can't provide the right type of stabilization for thumb joints.

2

Place Padding Between the Fingers

Tuck a small piece of gauze, cotton, or folded tissue between the injured finger and the buddy finger where they'll touch at the joint. This prevents moisture buildup and skin maceration during extended wear. For buddy taping that lasts more than a day or two, padding is essential.

Cut the padding to fit the contact area only — don't wrap it around the fingers. You want breathability everywhere the tape isn't touching.

3

Wrap Below the Injured Joint

Starting below the injured joint, wrap the tape around both fingers with 2-3 snug passes. With self-adhering tape, the first pass anchors by overlapping onto itself — no adhesive needed. Keep the wrap snug but not tight. You should be able to slide a fingernail under the edge without force.

Wrap in the direction that naturally closes your hand into a fist. This prevents the tape from fighting your grip during use.

4

Wrap Above the Injured Joint

Add a second wrap above the injured joint — same technique, 2-3 passes. The two wraps create a stabilizing bracket: one anchor below the joint, one above, with the injured joint free to flex between them. Leave the fingertips exposed so you can monitor circulation — if tips turn white or numb, the wrap is too tight.

Check your buddy tape every few hours for the first day. Swelling changes throughout the day, and a wrap that felt right in the morning may need adjustment by afternoon.

Guard-Tex self-adhering tape for buddy taping
Painless Buddy Taping

Guard-Tex Self-Adhering Tape

The ideal buddy tape. Bonds to itself — never to swollen, tender skin. Daily tape changes go from painful to painless. 3/4" width wraps fingers perfectly. Tears by hand. Zero residue. Made in Elk Grove Village, IL since 1935.

Shop Guard-Tex →

Buddy Taping Stories

"Jammed my pinky in a volleyball game. Doctor said buddy tape for two weeks. The first few days with athletic tape were miserable — pulling it off swollen skin twice a day. My athletic trainer gave me a roll of Guard-Tex and the daily changes became nothing."

Amanda T. — College Volleyball Player

"My son jammed his index finger at baseball practice. We buddy taped it with Guard-Tex and he was back at practice the next day. The tape stayed on during the game, came off painlessly for icing, and retaped in seconds. Three weeks and he was fully healed."

Mike D. — Little League Dad

"I've buddy taped probably a hundred jammed fingers in my years as a school athletic trainer. Self-adhering tape is the only thing I use now. Kids won't flinch during tape changes, and I can reposition the wrap on the spot if it's not right. Adhesive tape is a non-starter for me now."

Keisha W., ATC — High School Athletic Trainer

"Sprained my ring finger rock climbing. Buddy taped it with Guard-Tex for three weeks — climbed through the whole recovery with it on. The tape survived chalk, sweat, and daily retaping. No adhesive pulling on the sprain. That alone probably cut a week off my recovery."

Jason P. — Indoor Climber

Beyond the Wrap

If you're trying to decide whether you need buddy tape or a rigid splint, our buddy tape vs splint guide walks through every common injury type and what each one actually needs. Many serious injuries start in a splint and transition to buddy taping during rehab — both pages cover that handoff.

Sport-specific wrapping guides go beyond basic buddy taping: volleyball finger taping covers the multi-finger wraps players use for blocking and setting. BJJ finger taping covers grip protection for gi work. The finger protection tape guide covers general wrapping techniques for any activity.

For understanding how self-adhering tape works and why it doesn't stick to skin, read our guide to self-adhering tape. For direct product comparisons, visit our comparison hub.

Frequently Asked Questions About Buddy Taping

Mechanically, yes — any tape that creates a snug wrap will buddy tape a finger. The problem is daily removal. Adhesive athletic tape and medical tape bond to skin, and buddy taping requires daily tape changes on swollen, tender joints. After a few days, the skin under the tape is raw from removal pulls. Self-adhering tape bonds only to itself, so it slides off without touching skin — every change takes ten seconds and causes zero discomfort.
Most mild jammed fingers need buddy taping for 1-2 weeks. Moderate sprains may need 3-4 weeks. Remove the tape daily for washing and joint inspection — check for changes in swelling, color, or range of motion. Retape fresh each day. With self-adhering tape, daily changes are painless because nothing bonds to your skin.
Yes. Buddy taping is a common self-care technique for minor jammed fingers and mild sprains. Follow the four-step technique above. But if the finger is visibly deformed, extremely swollen, numb, or you can't bend it at all — see a doctor before taping. These signs may indicate a fracture or dislocation that needs proper medical treatment, not buddy tape.
Pair the injured finger with the adjacent finger closest in length. Index pairs with middle. Ring pairs with middle or pinky. Pinky pairs with ring. Never buddy tape the thumb — thumb injuries require a thumb spica splint. The buddy finger acts as a living splint, so matching length ensures proper joint alignment during flexion.
Yes — that's one of buddy taping's main advantages over a rigid splint. The buddy finger provides lateral stability while allowing grip and flexion. Most sports leagues allow buddy-taped fingers. Self-adhering tape is preferred for sports because it stays on through sweat, survives impacts, and can be retaped on the sideline in seconds without scissors or adhesive removal.
For buddy taping specifically, yes. Buddy taping requires daily tape changes on swollen, tender joints — often for weeks. Adhesive tape bonds to inflamed skin and makes every removal painful. Self-adhering tape bonds only to itself and ignores your skin completely. The mechanical support is identical; the daily experience is completely different.

Shop

Get Guard-Tex

3/4" is ideal for buddy taping — wide enough to stabilize the joint, narrow enough to allow finger flex.

Buddy Tape Without the Pain.

Self-adhering tape that never touches your skin. Daily changes. Zero discomfort.

Shop Guard-Tex →